There are many terrifying things about finishing college. Many graduates are concerned with entering the real-world market. For me, it was entering a world without 24/7 print shop access. What was I to do without acid baths, graining sinks, pressure washers, and printing presses? Answer: Cyanotype. 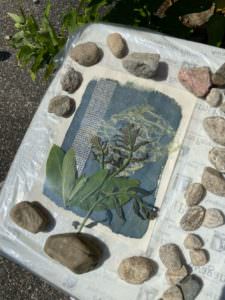
I have worked in most printmaking methods, but cyanotype hadn’t piqued my interest. What can I say? I am not a blue person. The realization that there was an accessible method and materials that didn’t require traditional makers spaces was evolutionary. All I needed was a dark room and a sunny day.
Cyanotypes were invented in the 1840s by astronomer and chemist John Federick William Herschel. Anna Atkins, a trained botanist, popularized the technique by establishing this photographic process as an accurate alternative to scientific illustration. One of the earliest examples is her book, Photographs of British Algae: Cyanotype Impressions. 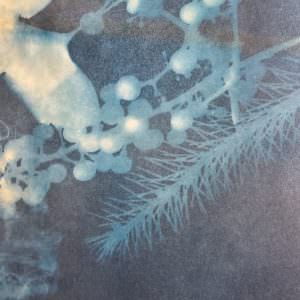
Cyanotypes are defined as, irreproducible prints, with white silhouettes on Prussian blue grounds. A mixture of equal parts ferric ammonium citrate and potassium ferricyanide is applied in a low-light environment. Jacquard makes an easy-to-use kit found at most art retailers. The importance of coating your paper evenly and in a low-light environment will ensure further success. A foam brush gets an even layer and clean margins. However, I love the look of using a brush and creating wispy margins. After coating, the paper is left to dry in your ‘darkened room.’ An actual dark room with red light is ideal. However, you can use a low-lit room with covered windows. I usually put them in the bathtub. Works like a charm.
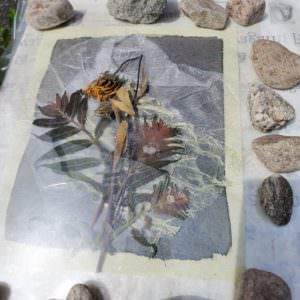
Papers, most recently tried:
Natural Kozo Medium Weight M-0202
Green Tea Flecks on Green G-0016
Mitsumata Unryu Heavy Weight Brushed Surface G-0006
Masa Soft White I-MM or I-MMLg
Now the fun part. Exposure! Artists traditionally arrange their compositions in a dark room. If you lack bat vision, move into a more lit area as long as your coated paper remains out of direct sunlight – the brighter the area, the faster you’ll need to work. The first time I tried making cyanotypes, I arranged my entire composition outside in direct sunlight. It felt like a fast-paced game show. Not exactly a relaxing experience. However, the prints worked due to my lightning speed.
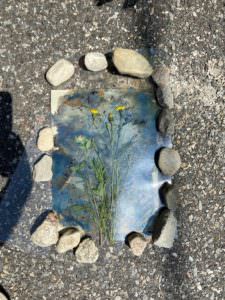
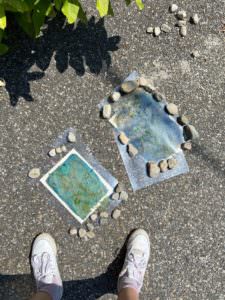
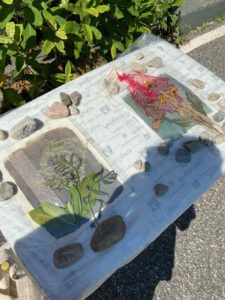
I suggest placing your coated paper on a sheet of plexiglass, firm paper, or cardboard before arranging your composition. This will make transferring your piece into the sunlight easier. Arrange objects you’d like exposed, remembering that cyanotypes are silhouettes of objects. If you place a smaller leaf inside a large leaf, the larger leaf will only be exposed. The larger consumes the smaller leaf. After completing your composition, place a sheet of clear glass, plexiglass, or acetate on top to weigh down the objects. Your sandwiched cardboard, paper, and Plexi are ready to move outside into direct sunlight. I strongly recommend using rocks or other paperweights to hold down your work if you use acetate instead of glass or plexiglass. The wind can and will blow everything away. It’s embarrassing chasing after your artwork in the parking lot while your neighbors watch. Ask me how I know. 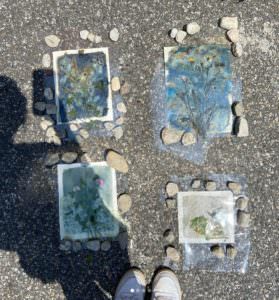
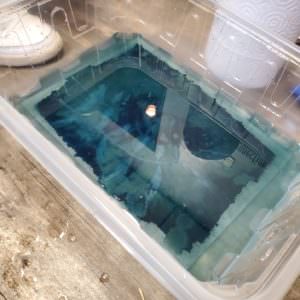
Once the cyanotype turns a bronzy-brown color, it is ready to be washed out. Carry the entire sandwich out of direct sunlight. Use cool water to wash the print. Many artists prefer to do this in some kind of low vat or tub, continuously agitating the paper by rocking the vat back and forth or using their hands. The print is thoroughly washed out when the ground has turned blue, and the silhouettes lighten. While it dries, the Prussian blue grows deeper in color.
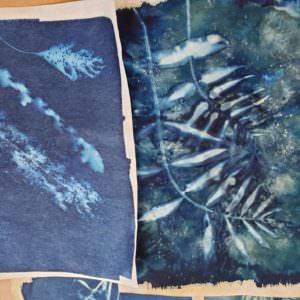
Since the 1840s, this is how traditional cyanotypes were made. However, as with any medium, artists have pushed boundaries. My personal favorite is wet cyanotypes. This technique adds manipulators such as herbs, salt, pepper, coffee grounds, and lemon juice while the paper is still wet with chemistry, creating multiple colors and variations. Move sandwiched piece (while wet) into the sun to finish exposure. The results have a more painterly appearance, with the overall look of being hand-dyed. This method gives a more botanical or nature-inspired feel.
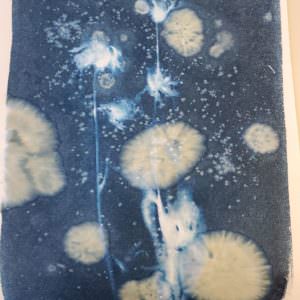
Amendments added to your wet work create texture and color:
Salt makes small spots or an acid-dye effect.
Lemon juice produces large spots.
Foamy soap gives a subtle washy effect, changing the deep blue background to earthy green.
Kitchen items such as turmeric, paprika, tea, and coffee can be sprinkled to create more color variations. Experiment with any and everything! Effects will vary.
The rest of the wet process is similar to the traditional dry cyanotype except for exposure time. Dry cyanotypes take 5-30 minutes, determined by sun conditions. Wet cyanotypes may take up to 24 hours. Generally, the longer you can leave exposed to the sun, the better. I typically leave mine for two hours in full sun. I recently taught a workshop at Paper Connection with students waiting as little as 30 minutes before washing their prints. Their pieces turned out beautifully.
Currently, I am using wet cyanotypes to re-panel lampshades I thrifted. The light shining through really emphasizes the subtleties in texture and color. Overall, I love the accessibility cyanotypes give my artistic practice. I enjoy making simply for the joy it brings me. What will you make with cyanotypes? I would love to see. Stay tuned for more workshops through Paper Connection. Many thanks to Lauren Pearlman for helping with photography.
Note: In the next blog post, we’ll do a deeper dive into papers that work well with cyanotypes.
Check out our Monthly Subscription Service and Shop Paper Pastiche!
our papers help tell your story – want more? https://paperconnection.com/news/

2 comments
Paul Alexander
Truly wonderful. I enjoyed that workshop so much and you’ve helped preserve that experience.
Paper Woman
Thank you for your feedback Paul. Your presence means so much. Don’t forget we have your potpourri bowl here!