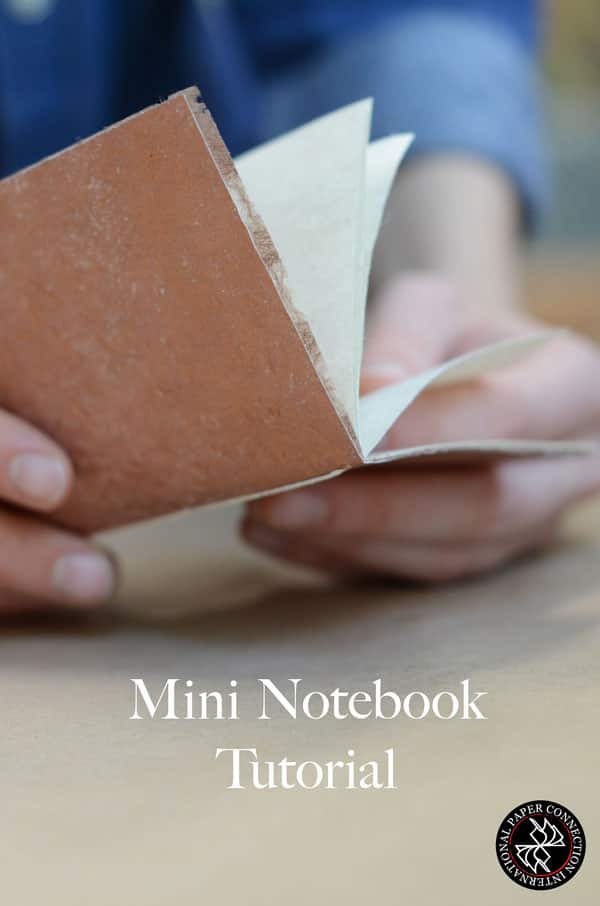
Learn how to make a handmade mini pocket notebook! The Paperwomen at Paper Connection wanted to share a DIY bookbinding demo for those of you who love books, beautiful paper and miniatures.
SUPPLY LIST
4 sheets for inside paper– 4×6 in.
1 sheet for cover paper– 4×6 in.*
*note: depending on the thickness of your paper, making the cover 4×6.25 inches is a good idea, so the pages don’t extend past the cover!
awl – pointy tool used in bookbinding. Also a great crossword word!
bone folder
scissors -or a utility knife
linen thread-or any type of thread or twine
book binder’s needle
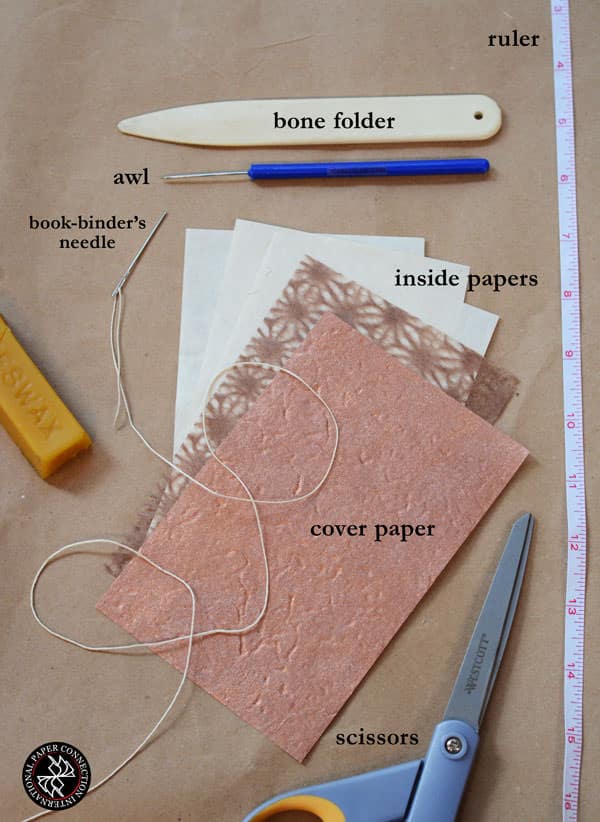
PAPERS WE RECOMMEND
You can use almost any paper you have handy, however, you will need a thicker sheet for the cover, because it needs to be durable. The inside pages should be slightly thinner. For this demo we used a natural lightweight lokta paper (25g/m²) from Nepal for the inside paper, and copper metallic and momi lokta for the covers. We added a little brown asanoha patterned lace paper from Japan for decorative “end” sheets. To see more paper choices, browse Paper Connection’s our online catalog.
STEP 1: FOLD SHEETS IN HALF
Your first step is to fold each of the 4×6 in. sheets in half lengthwise, and crease or burnish with a bone folder.

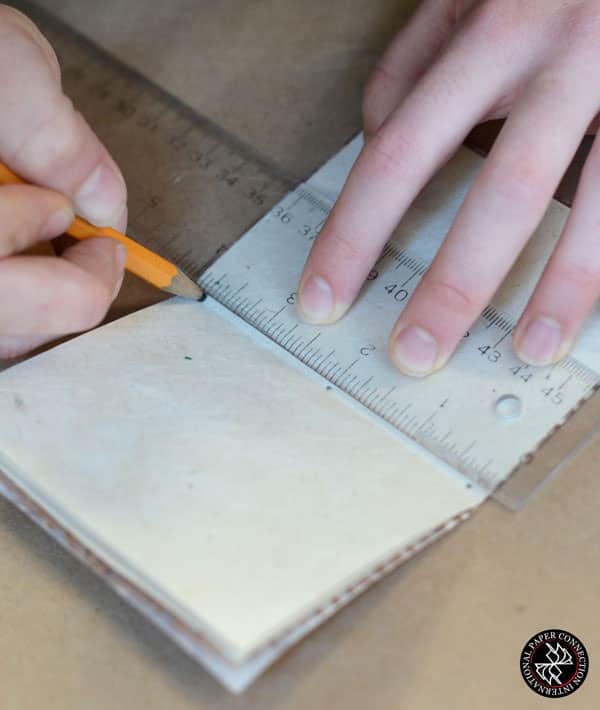
STEP 2: MEASURE 3 HOLES
Find the center at 2 in. and make a mark in the crease. Measure 1/4 in. from both outside edges for the second and third holes.
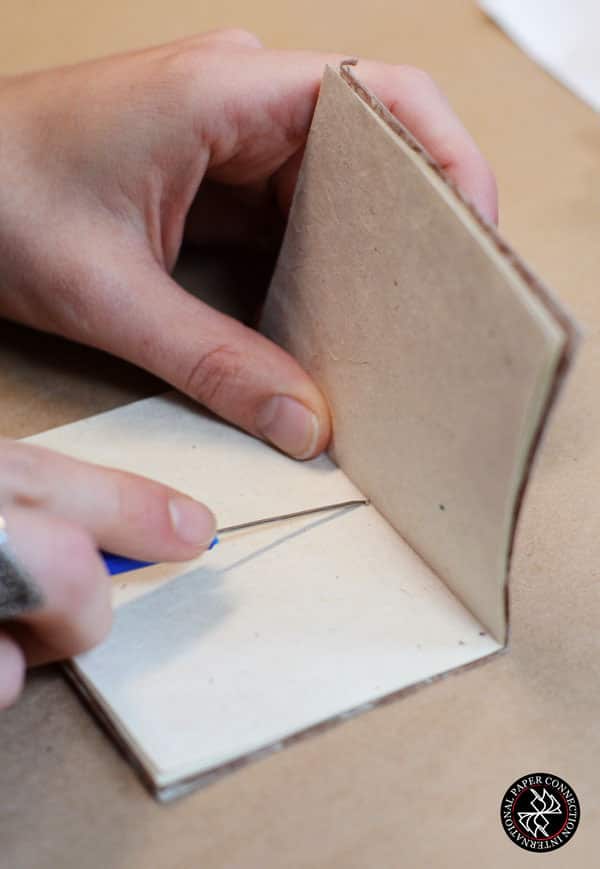
STEP 3: POKE HOLES WITH AN AWL
Carefully poke a hole with the awl through the center of the crease at each mark, making sure that all of your paper is lined up
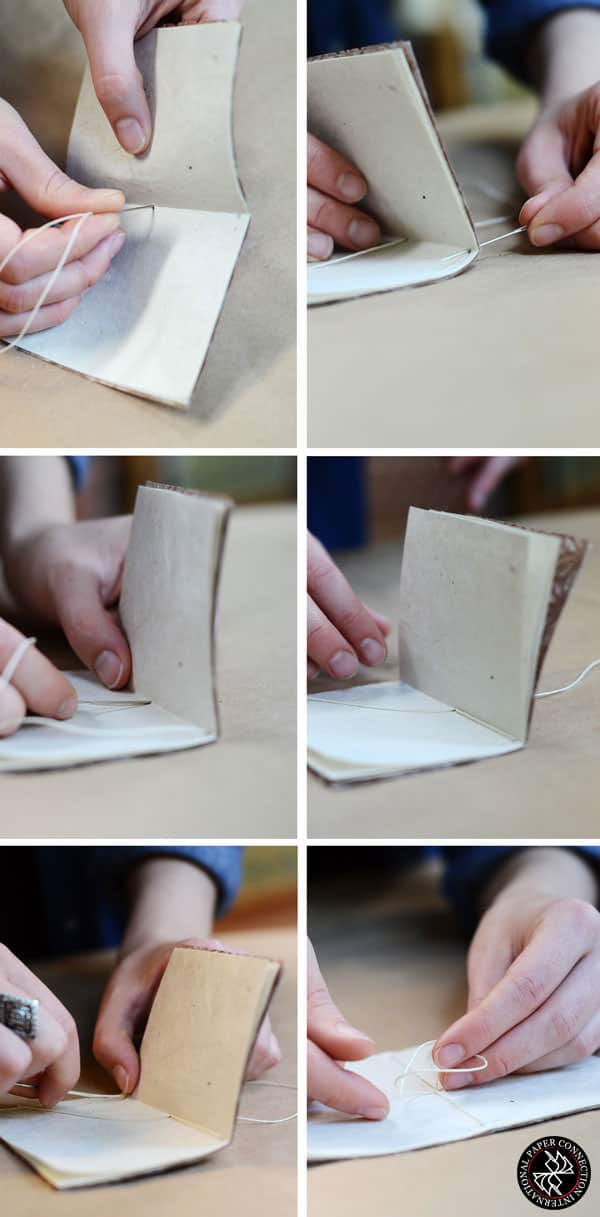
STEP 4: SEWING
Start from the inside of the notebook at the middle hole and feed the needle and thread through all of the pages leaving two inches of thread to be tied off later. Next, feed the thread back through the outside of the notebook at one of the outer holes and come back through the center hole. Repeat this step with the opposite outside hole, but this time tie it off at the center instead of feeding it back through.
NOTE: We chose to place the knot on the inside of the book, but some people like to tie it off from the outside and leave a little extra thread or a bow. To try it this way, reverse these instructions and start your sewing from the outside of the book instead of the inside.
And you’re done!